-
Waterproof Synthetic Paper

- Waterproof Synthetic Paper
- View All
- SYNAPS OM
- SYNAPS OM Wide Format
- SYNAPS XM
- PP Synthetic
-
P.O.P. Displays, Banner Stands & General Signage
- P.O.P. Displays, Banner Stands & General Signage
- View All
- SYNAPS OM
- ClingZ®
- Trifecta®
- VinylEfx®
- Premium Vinyl
- Classic Vinyl
- PolyEfx®
- Nekoosa CV300 Series®
-
Window, Wall & Floor Graphics
- Window, Wall & Floor Graphics
- ClingZ®
- Ztac™
- Sign-Ad®
- Hi-Stat®
- Trifecta®
- VinylEfx®
- Nekoosa CV300 Series®
- Overlaminates
- Mounting Films
- Barrier Film
- Wall Graphics®
- Walk-On Graphics®
- Dye Sublimation
-
Outdoor Graphic Media
- Outdoor Graphic Media
- NextBond®
- Premium Vinyl
- Overlaminates
- Mounting Films
- SYNAPS OM
- SYNAPS XM
- VinylEfx®
- Nekoosa CV300 Series®
- Overlaminates
-
Cut Films
- Cut Films
- View All
- VinylEfx®
- Nekoosa CV300 Series®
- PolyEfx®
- Application Tapes & Premasks
- Carbonless Papers
-
Extruded Films
- Extruded Films
- View All
- ClariCap®
- ClariGuard®
- Security Films
- PETg
- Polycarbonate
- Applications
-
Printer Compatibility
- Printer Compatibility
- View All
- Latex
- Eco-solvent/Solvent
- UV Wide Format
- Offset
- HP Indigo
- Digital Dry Toner/Laser
- Screen
-
Sustainability
- Sustainability
- NextBond®
- Nekoosa Promise®
- Corporate Sustainability & Stewardship
- About Us
- Blog
- Nekoosa Bucks
- Request A Quote
- Resources
- Find A Distributor
- Job Openings
- Contact Us
There’s usually more than one way to do something. Printers and sign makers have devised many different techniques for laminating prints. This story covers procedures that have worked for some industry friends. Hopefully, these tips will help you prevent laminating mishaps, save production time and, most importantly, improve profitability.
Safety First, AlwaysReview the safety precautions outlined in the equipment manual with your employees. Never wear loose clothing when operating the machinery. Long hair should be tied back. Wearing a hair net could prevent hair from falling onto a print and being encapsulated.
Keep your hands away from any moving parts. If you’re wiping down the rubber rollers, disconnect the power — this prevents accidents from occurring, especially if the laminator is accidentally turned on. If you need to advance the rollers, reconnect the power. After you’ve advanced the rollers, pull the plug again. Use a clean, lint-free rag and a mild, non-abrasive cleaner to wipe down the laminator.
Compatibility of Printing Systems
The interaction of inks, printing systems and print media involves very complex chemistry. Incompatibility among components can adversely affect the ability of the overlaminate to adhere to the print and result in delamination.
TEST, DON’T GUESS. Always test and evaluate your raw materials (overlaminates, wide format print media, and mounting substrate) before a production run. When you find a winning combination, stick with it.
One recommended combination is using a calendered vinyl overlaminate with a calendered vinyl film. Similar films expand and contract at the same rate. Dissimilar films don’t. As a consequence, the overlaminate can delaminate from the base film or substrate. A tunnel could also form between the two dissimilar films.
Overlaminate problems can also result when a print is mounted to a substrate that expands and contracts at a high rate. The resulting tension between the print and the laminating film, can cause tunneling or delamination.
How to Properly Store Overlaminates
There are right ways and wrong ways to store overlaminates and other pressure sensitive materials, such as application tape and vinyl. The wrong way is to stack the rolls of unboxed overlaminates horizontally on top of each other. Doing this can create flat spots in the rolls, which can appear as a visible line, after the overlaminate is applied to the print. SEE: "Nekoosa's Overlaminate Films Portfolio"
The recommended way to store rolls is to keep them in their boxes, stacked upright, until you need them. Although the corrugated containers used for overlaminates are designed to withstand the rigors of shipping, stacking these boxes horizontally can result in their collapse, when weight becomes excessive.
The best storage area is the same one in which you print. An ideal temperature and humidity controlled room is at 70°F (21°C) at 50% relative humidity. Under these conditions, the expected shelf life of your overlaminates is +1 year(s).
Maintaining a Good Shop Environment
Along with being spotlessly clean, the ideal shop is temperature and humidity controlled. In cleaning your machinery, never use an air hose. Much of the blown off dirt goes airborne and eventually settles on your raw materials. Dirt trapped between the print and the overlaminate usually results in tenting of the laminating film over the trapped particle. To clean the rollers of your laminator, try using a tack cloth.
Before applying an overlaminating film to your print, be sure the ink on the print is completely dry. If the ink is not cured, some of the problems that can ensue are: bubbles under the laminate; yellowing of the media and overlaminate; migration of solvents through a vinyl film and into the adhesive, causing adhesion failure. Two good rules of thumb are to wait 24 hours before laminating the print, so the inks can cure properly; and before mounting or rolling up the laminated print, let it lay flat for 24 hours.
Print-drying time varies, depending on the print’s ink density, the ambient temperature and your shop’s humidity Even though the print feels dry to the touch, the ink may not be completely cured. The time it takes for a print to dry varies depending on the density of the ink on the print, ambient temperature and the humidity in your shop. Usually, inks take longer to dry, when temperatures are cooler and the humidity is high. Consult the manufacturer’s recommendations on drying time.
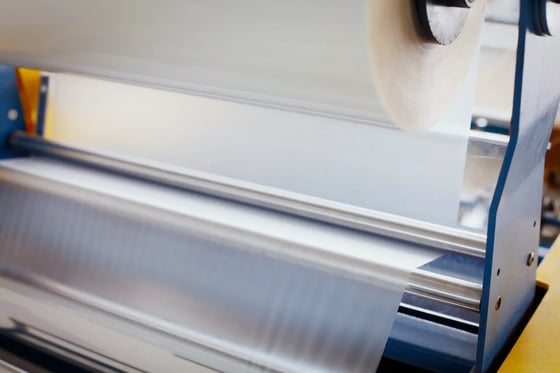
Read & Heed: Threading the laminator. Before threading the overlaminate through the machine, study the roll-laminator diagram in your owner’s manual. The laminated print’s finished appearance depends upon several variables, including the feed rollers unwind tension, the nip rollers’ pressure, laminating speed and temperature.
Before threading the overlaminate through the machine, study the roll-laminator diagram in your owner’s manual.
All laminators are different, so you must determine your machine’s optimum settings. After you load the overlaminate roll onto the unwind shaft and secure it in place, make sure the roll can’t shift from side to side. The tension on the unwind roll should be low. As a general rule, use the least amount of tension to accomplish the job.
Don’t allow the unwind roller to free-wheel. A slight amount of tension ensures that the overlaminate feeds into the nip rollers evenly. Some back tension will prevent wrinkling and trapped air bubbles.
High unwind tension stretches the overlaminate. Any stretched film, especially a stiff film like polyester, has a memory and tends to return back to its original shape. This can cause the laminating film to either curl in the direction of, or delaminate from, the print. Excessive tension can also contribute to delamination of the print from the substrate to which it’s mounted. High unwind tension and high laminating pressure can result in the print curling.
Set Up Steps
Don’t expect satisfactory laminating results, if your laminator is not set up properly. Regularly inspect the laminator rolls to see that they are in good condition and adjusted properly. Rolls, which are not perfectly smooth and parallel, and not adjusted so the pressure is consistent across the web, can cause problems. These problems include trapped air bubbles, wrinkling and poor adhesion.
Adjusting roll pressure so that it is consistent across the web can frustrating, if your machinery has adjustment screws, instead of using air cylinders for adjustment.
Laminator manufacturers typically recommend periodic testing of the laminator “footprint”, which requires a special nip impression transfer paper. In checking the footprint of the rolls, sheets of the nip impression paper are positioned across the web. After the rolls are hot, close them for ten seconds. After removing the sheets, inspect the impression for consistency. Inconsistent impressions will reveal any unevenness in pressure across the roll. Uneven pressure can result from rolls which have either a concave or convex shape or that are canted.
Laminating Graphics
Printers have developed many different laminating techniques. There is no wrong way or right way to laminate. If you find a technique that works for you, continue to use it. Here’s one that you might try. Slit the release liner, 18 to 24 inches (45.7 cm to 61cm) from the overlaminates lead edge, across the web, without cutting through the facestock of the film. Don’t remove the liner from these first couple of feet of overlaminate. This lead edge will aid film feeding and prevent the adhesive from sticking to, and wrapping around, the bottom roller.
Next, from the slit you’ve made, peel back enough liner so you can tape it to the take-up shaft (if your laminator is equipped with one). As you guide the overlaminate through the rollers, ensure that the material is feeding evenly, and that no wrinkles or bubbles are forming. During startup, you likely wasted a few feet of overlaminate.
Once everything is running smoothly, you can feed the prints into the laminator. Laminating prints is always easier if one person stands in front of the machine and feeds the print, and another person guides the laminated print and prevents the laminate from wrapping around the rollers.
Apply laminating film to a print in one continuous pass. And, whatever you do, don’t stop in the middle of a print to see how it’s going. Starting and stopping during this process will pick up the impression of the release liner — at the point where the liner and film separate — causing silvery lines in the adhesive and over the print. This is especially noticeable over the print’s dark “shadow” areas. Note that, in most cases, this problem can be easily fixed by burnishing the line with your thumb nail to aid the adhesive in wetting out.
Speed and settings. Pressure-sensitive films usually laminate better at slower speeds. Thus, set your laminator’s machine speed to 3 to 5 ft. (.9m to 1.5m) per minute. Then set the machine’s pressure-control gauge, which governs the nip rollers’ pressure.
Pressure-sensitive overlaminates require pressure so the film’s adhesive properly flows out and makes complete contact with the print’s surface. Insufficient pressure can result in silvering and air-bubble formation. Conversely, excessive pressure can cause print wrinkling and curling.
Requisite pressure for applying a laminating film varies. Overlaminates generally require between 30 to 50 psi (2.1 to 3.5Kg/cm) of pressure. If air bubbles appear, you can increase the nip pressure, slow the laminating speed, and, if worse comes to worse, apply a little heat.
Thicker overlaminates, such as 5-, 10- and 15-mil (125-, 250– and 375 micron) polycarbonate films, typically require higher pressure settings. When laminating graphics with these films, using a “sled” (which comprises an 1⁄8-in. (.3cm) sheet of polycarbonate or acrylic) underneath the print can increase pressure and even out the pressure across the laminator’s web.
Should you use heat when laminating a pressure-sensitive film? Some people argue that, with a little heat on the top roller — from 80 to 110°F (26.6 to 43.3°C) — the overlaminates adhesive flows out better, which creates a better bond to the print and can prevent silvering.
An opposing argument says that heat can cause the overlaminate to stretch. As the overlaminate cools, it contracts, causing the laminating film to shrink and in some cases delaminate from the print. The shrinking film quite often causes the print to curl to the print side. Heat can cause other problems too, including waviness, tunneling and wrinkles. Thus, it’s best not to use heat, unless you have a serious problem.
Rolling Laminated Prints
Whenever possible, store and ship prints flat, especially when using polyester overlaminates. Generally, a flexible overlaminate, such as vinyl, is preferred for rolled graphics. If you need to roll a print, place the printed image on the outside of the roll. Never roll a print too tightly, or you’ll end up with tunneling between the overlaminate and print.
When rolling up a printed vinyl film with a vinyl overlaminate, the outside diameter of the core should be no less than 6 in. (15 cm). When rolling graphics, which are protected with a thick (5 to 15 mils, i.e., 125 to 375 microns) vinyl or polycarbonate overlaminate, the interior roll should be no less than 12 in. (30cm) in diameter. Basically, the thicker the overlaminate, the larger the core diameter.
Cleaning Laminated Prints
Before delivering prints to customers, instruct them how to properly care for their new graphics. To clean laminated prints, use a mild, non-abrasive cleaner — one that doesn’t contain a lot of acid or alkaline, or a strong solvent. When washing graphics, use a sponge or soft rag. Hard, bristle brushes will scratch an overlaminating film’s — especially 3-mil (75 micron) PVC films — surface. The cleaner should be neither strongly acidic nor strongly alkaline. Do not use cleaners with a strong solvent. Vinyls are very soft plastics and hard bristle brushes will scratch the surface of the overlaminating films. To dry use a soft, clean cotton towel and gently wipe the surface.
-png.png?width=1120&name=ArchivedRTape_Banner%20(1)-png.png)