-
Waterproof Synthetic Paper

- Waterproof Synthetic Paper
- View All
- SYNAPS OM
- SYNAPS OM Wide Format
- SYNAPS XM
- PP Synthetic
-
P.O.P. Displays, Banner Stands & General Signage
- P.O.P. Displays, Banner Stands & General Signage
- View All
- SYNAPS OM
- ClingZ®
- Trifecta®
- VinylEfx®
- Premium Vinyl
- Classic Vinyl
- PolyEfx®
- Nekoosa CV300 Series®
-
Window, Wall & Floor Graphics
- Window, Wall & Floor Graphics
- ClingZ®
- Ztac™
- Sign-Ad®
- Hi-Stat®
- Trifecta®
- VinylEfx®
- Nekoosa CV300 Series®
- Overlaminates
- Mounting Films
- Barrier Film
- Wall Graphics®
- Walk-On Graphics®
- Dye Sublimation
-
Outdoor Graphic Media
- Outdoor Graphic Media
- NextBond®
- Premium Vinyl
- Overlaminates
- Mounting Films
- SYNAPS OM
- SYNAPS XM
- VinylEfx®
- Nekoosa CV300 Series®
- Overlaminates
-
Cut Films
- Cut Films
- View All
- VinylEfx®
- Nekoosa CV300 Series®
- PolyEfx®
- Application Tapes & Premasks
- Carbonless Papers
-
Extruded Films
- Extruded Films
- View All
- ClariCap®
- ClariGuard®
- Security Films
- PETg
- Polycarbonate
- Applications
-
Printer Compatibility
- Printer Compatibility
- View All
- Latex
- Eco-solvent/Solvent
- UV Wide Format
- Offset
- HP Indigo
- Digital Dry Toner/Laser
- Screen
-
Sustainability
- Sustainability
- NextBond®
- Nekoosa Promise®
- Corporate Sustainability & Stewardship
- About Us
- Blog
- Nekoosa Bucks
- Request A Quote
- Resources
- Find A Distributor
- Job Openings
- Contact Us
When choosing where to install a floor graphic, finding the perfect spot where the flooring surface is in good repair, and well bonded to the structural surface is the first step. Loose, cracked or uneven surfaces will prevent the graphics from adhering properly and will present a potential trip hazard.
It is also best to avoid grout lines, when possible. Graphics do not adhere as well to grout unless sealed.
If you are installing over grout lines, ensure that the edges of the graphics are fully supported and not aligned with the edge of a grout line. This will minimize the chance that lifting occurs during normal floor cleaning/ maintenance.
How to Prepare the Surface for Application
First and foremost, clean the surface where the graphics will be applied to remove all dirt, grease, oils and loose debris. Using a lint-free cloth with an appropriate neutral degreaser/cleaner for the hard floors, followed by Isopropyl Alcohol (rubbing alcohol) should be sufficient. Make sure to clean several inches of the floor around the graphics to allow for final placement adjustment. Also, ensure the surface temperature is at least 40oF prior to installation. *Please note, carpeted areas should be vacuumed.
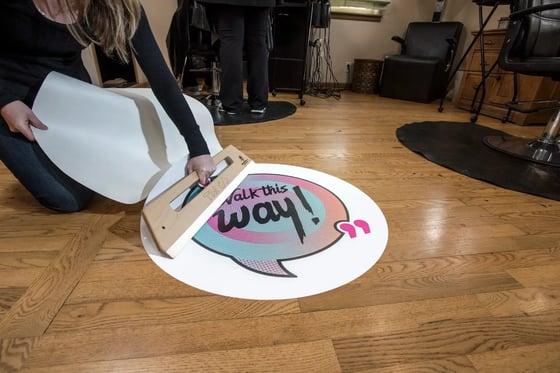
Step-By-Step Floor Graphics Application
Again, in standard situations, simply ensure you clean the surface thoroughly prior to applying the graphic.
- Position graphics on desired location, for hard surfaces, avoid aligning edge of graphics grout lines. Use masking tape on one end, if necessary, to hold graphics in position.
- Remove release liner from corner (opposite corner if using tape), start to peel down and away from top, holding edge off surface.
- Using squeegee, apply pressured from middle towards edges with overlapping strokes. Ensure graphics conform to any grout lines. *If repositioning is required, gently lift graphics and reapply.
- Ensure all edges and corners are applied with firm pressure. When more than one panel is used, butt the edges together. Never overlap graphics.
- After application is complete, do not polish graphics or surrounding floor for at least 24 hours.
We recommend using an edge sealer to extend the life of the floor graphic. If edges lift at all from the floor, the graphics should be immediately removed from the floor and replaced. This is the prevent any trip hazard. After curing period, at least 24 hours from installation, Walk-On Graphics® can be maintained using normal floor maintenance procedures.
-2.jpg?width=300&name=Walk-OnGraphics(2)-2.jpg)
Removing Nekoosa's Walk-On Graphics®
Learn more about Walk-On Graphics® HERE.Start by lifting one edge and pulling at a sharp angle. Using a consistent, smooth force, continue to peel off the graphic from the surface area. For larger graphics, the edge can be slit and allowed to tear, so that the graphics can be removed in sections rather than as one large piece. If any residual adhesive sticks to surface after removal of the graphic, it is recommended you use Isopropyl Alcohol to remove the residue.